Curried Pumpkin Soup


I was in NYC last week partially for play, partially for work. Even though my birth certificate says New York, New York, I am not one of those people who loves New York. This is not to say that I don’t enjoy it and that there definitely aren’t parts of it that I wish I could transplant to the Chi or that I wouldn’t even consider living there one day, but when people find out that I spent every summer and holiday there and that most of my extended family still lives there, the reaction is always, “don’t you just love New York? How can you not live there???” It’s hard to explain that I’ve gotten used to the pace of Chicago, the simplicity, the ease of it, but it’s even harder to explain that being there is always a little bittersweet, because everything from the airport to the subway to the pretzel stands to just about every corner of Midtown (and a few in the Bronx, Queens, Long Island and Brooklyn) is part of a memory of a family that is close to existing only in my mind. Our times in New York were filled with so much fun and laughter that it seems impossible that any new times in the city would ever truly compare. It sounds absolutely bizarre, but even amid the tourists and the traffic and the noise and the people rushing past me, I can get so caught up in remembering some moment walking down 57th street with my grandfather or waiting on the #4 train platform with my dad that I find myself just standing still in the middle of the sidewalk trying to catch my breath. And if you’ve ever wondered what it sounds like to have what feels like 5,000 people scream at you at once, I highly recommend stopping dead on a sidewalk in Manhattan at rush hour. Good times.

Before I get way too caught up in family history, I’ll tell you what may actually be the real reason I waiver on moving to the East Coast: the weather. Yeah, yeah, I know, I live in Chicago and it’s cold and windy and blah blah blah. But, y’all, the East Coast is extreme. For real. I had never seen as much snow as I did when I went to school in Poughkeepsie, which is just 1.5 hours by train from NYC. I mean, it was up to our hips from January until April (for all of you wondering, it is too cold in Chicago to snow that much. I’m not saying cold is better than snow, it’s just what I’m used to). And summer in New York? Fuggedabouit. The Chi may be hot and humid, but at least we have a bit of lake breeze to cool us off. I spent many an NY summer trying to stay as still as possible. And right now, as we are 6 weeks away from the official start of winter, I’m reading post after facebook post about how my New York friends are digging out from snow! In October! It’s a balmy 54 degrees and sunny in Chicago (although with the windchill it is 48. Just trying to keep it honest).

Anyhoo. One friend posted a picture of her deck covered in snow and said that she wanted soup, and I realized that I had a pumpkin soup recipe that had, like so many others, been waiting for a good story. I recognize that I haven’t necessarily provided that, but at least I’m posting a holiday specific recipe in time for you to make it before Halloween and, if you’re on the East Coast, at least I have something to keep you toasty over this cold weekend. Baby steps, friends, baby steps.

I love the kick that the curry adds, plus it complements the pumpkin in a way that is surprising given every other pumpkin-ish dish is sweet. I think milk would be a fine substitute for the cream and do not feel a shred of guilt over using canned pumpkin. Also, this could be totally vegetarian if you use vegetable stock/broth instead of chicken stock. The croutons are left over no knead bread, also an excellent way to heat up the house on a chilly day.

Stay warm, New Yorkers! My heart may belong to the Second City, but you know I’ll always have a huge crush on you….

Curried Pumpkin Soup, from The Complete Book of Soups and Stews by Bernard Clayton, Jr.

  • 4 tablespoons (1/2 stick) butter
  • 1/2 cup chopped onion
  • 1 garlic clove, mashed and diced
  • 2 cups pumpkin puree, freshly made (?!) or canned
  • 4 cups chicken or vegetable stock or broth
  • 1 bay leaf
  • pinch sugar
  • 1/3 teaspoon or more curry powder
  • pinch nutmeg (or pumpkin spice)
  • 1/2 teaspoon salt, if desired
  • 1/4 teaspoon black pepper, freshly ground
  • 2 cups light cream

Melt butter in medium (3 quart) saucepan over medium heat. Add the onion and garlic, cover and cook until soft and translucent, about 8 minutes.

Add the pumpkin puree and stock. Stir well to mix. Add bay leaf, sugar, curry powder and nutmeg. Bring to a boil, lower to simmer and cook for 30 minutes. While soup is cooking, taste for seasoning. Add salt and pepper as needed.

Remove from heat and add cream (I’d temper the cream a bit–add a few tablespoons to 1/3 cup of soup slowly to the cream, just to bring the cream up in temperature. When you add the cream to the soup it won’t curdle). Return to heat only to bring temperature of the soup back to hot. Do not allow to simmer–rising steam only. Serve in hot soup bowls.

Buttermilk Biscuits


You know that I always try to have a little backstory to go along with a recipe, because I think that it’s much more fun to find out why someone cooks or bakes something than just read a recipe, which you can do on any cooking site. A lot of times, though, I have no good tale after I try a recipe, but I really want to share it and so I wander around trying to fit the recipe into a story, any story, so I can write about it. I mean, I’m not crazy (or committed) enough to go do something just so I can post about it and give you a recipe, but I do have a backlog of tasty treats that are hanging out just waiting for the right moment.

This is not one of those moments. The true story is that I bought a quart of buttermilk (seriously, who needs a quart of buttermilk?) in order to make sweet potato muffins for a brunch. Since the recipe only calls for 1/3 cup of buttermilk I had a full container when I was done.  I was thrilled when the lemon poppyseed cake called for a cup; I thought I could at least put a dent in the quart. But it’s obvious that buttermilk regenerates, because I swear that the carton was as full as when I started (and I made three of those cakes).  So as the expiration date approached, I started thinking about what else I could do.  Biscuits were the first thing that popped into my mind, but I dismissed them because I’m not a fan.  The ones I’ve had have always been heavy and chewy and too buttermilky–the tang of buttermilk is overpowering to me.  But I couldn’t find any recipes other than cakes and pancakes, so biscuits won by default.
Having never eaten a biscuit that I actually liked, I had every intention of just making them, taking a few pictures and pawning them off on my coworkers.  What really ended up happening is that I was late for work, because I was standing in my kitchen eating biscuits dripping with butter and honey like it was my job.  I moved from the “I’ll pass” camp to the “you’ll pass over all the biscuits now if you know what’s good for you” camp in less time than it took for them to cool.  They were light and layered and had a bit of sweetness (even without the honey) that balanced out the tartness of the buttermilk.  Even the next day they were soft and had none of that chewiness that I think plagues other biscuits.  Of course, I wouldn’t really know how they hold up for too many days, because there weren’t any left after day two.  But, you know what was still hanging around? 1/2 a quart of buttermilk. I kid you not.

Buttermilk Biscuits, courtesy of The Homesick Texan (I think I originally found the recipe on epicurious, but think it’s better to link to her actual site)

  • 2 cups all-purpose flour, plus more for kneading (9 ounces)
  • 1 tablespoon baking powder
  • 1 teaspoon granulated sugar, plus more to taste (I used just 1 teaspoon)
  • 1/2 teaspoon kosher salt
  • 8 tablespoons unsalted butter, cold (1 stick)
  • 3/4 cup half-and-half or buttermilk (I added a bit more to the dough, because it was a little dry as I was mixing)

Preheat the oven to 450 degrees and grease a baking sheet or cast-iron skillet.

Mix together the flour, baking powder, sugar and salt.  Cut the stick of butter into pieces and work it into the flour mixture with your hands or pastry blender until it resembles pea-size crumbs. Add the half-and-half or buttermilk, mixing until the dough is a bit loose and sticky.

Pour the dough out onto a floured surface and knead for a minute. Dough should be smooth and no longer wet. You can sprinkle more flour on the surface if you find it’s sticking. Make the dough into a ball and hit it with a rolling pin, turning it and folding it in half every few whacks. Do this for a couple of minutes (I actually just picked up the dough and threw it down over and over (fold over before throwing it down again).  Good tension release and upper arm workout).

Roll out the dough until it’s 1/4 of an inch thick, then fold it in half. Using a round biscuit cutter (you can use a glass or a cup if you don’t have a biscuit cutter–I used a measuring cup), cut out the biscuits from the folded dough. Place on a greased baking sheet or in a cast-iron skillet close together, about 1/8 of an inch apart (so they rise up not out), and bake for 15 minutes or until the tops are golden brown.

NOTE: If you don’t want to roll and cut them out, after kneading and beating the dough you can drop the dough onto the baking sheet with a spoon. They’re not as symmetrical (dropped biscuits are also known as cat-head biscuits), but they’re no less delicious.

Chilaquiles


So the good thing about all of the gallivanting and country hopping and general revelry that’s been going on in my world is that I’ve gotten to spend a fair amount of time laughing and eating and drinking with some of my favorite people.  The not-so-good part is that–even though I’m reluctant to admit it–I can’t recover from all the festivities as quickly as I did at the height of my gallivanting days.  I mean, there was a time when four gin and tonics (FOUR, people!) was the baseline for a happy evening and I could roll into bed a mere 3 hours before I had to be up and at work with nary a thought of a hangover.  Not so much, anymore… As my granny always said, youth is wasted on the young.

These days, there’s talk of “pacing” ourselves or “should we really be doing this on a school night?” or “I have an 8am conference call; I gotta get some sleep.”  I think the worst is “this is going to hurt in the morning.”   Nothing quite kills the second (third?) round excitement like the idea that you’re going to suffer for having fun.  I’ve always believed that coating your stomach (i.e., loading up on greasy foods) after a night of libations is definitely the way to combat feeling like death warmed over the next day.  Hey, some people believe in aspirin and gatorade; I believe in bacon and eggs and maybe some hashbrowns.  The problem is that the only diner within walking distance from me is closed on Sundays, which seems silly at best, heartless and cruel at worst.  This means that after a Saturday night of living it up, I’m faced with a bowl of oatmeal from my own kitchen or a schlep to a fancy place near me when the last thing I want to do is get dolled up and pay upwards of $15 for overcooked bacon and undercooked eggs.  Seriously a first world problem, I know, but I also know you’ve had the same debate, so let’s not judge, ok?

Lucky for me, while I was in Mexico and was [surprisingly] in need of comfort food one morning, I was presented with a plate of chilaquiles, which–roughly translated–is heaven and goodness on a plate.  I think I may have heard angels sing as I tucked into a spicy mix of eggs, cheese, tortilla chips and salsa verde.  The ill-advised shot of Agavero Tequila was a distant memory as my stomach settled and the world righted itself.  The great thing about this dish is that it’s full of ingredients that you usually have on hand (mind you, the original recipe calls for making your own salsa verde and tortilla chips, but who are we kidding here?  After a night of fun you’ll be lucky to make your way to the kitchen, let alone reinvent the salsa wheel…).  I whipped this up in under 10 minutes and within 30 I was feeling as though I may live to see another day.  I think you could easily dress it up with some chorizo or Italian sausage, a bit of avocado or corn salsa, and I’ve even seen a version with chicken. Go wild!  It’ll remind you of your youth. Without the embarrassing walk of shame part…

Chilaquiles Verde (if you want the labor intensive version, go here: http://www.epicurious.com/recipes/food/views/Chilaquiles-Verdes-354951)

  • 3/4 cup salsa verde (green salsa)
  • 2 large eggs, beaten
  • 1/2 cup shredded Monterrey Jack cheese
  • 2 tablespoons crumbled mild feta
  • tortilla chips
  • hot sauce, to taste

Pour the salsa verde in a medium frying pan.  Just when it starts to bubble, stir in the beaten eggs. Cook and stir for about 5 seconds, until the egg feathers into the sauce, thickening and binding it. Immediately add the chips (enough to cover the bottom of the pan), tossing gently until they have absorbed enough sauce to become soft. Take care not to break the chips. Sprinkle the Jack cheese on top and let it melt.

Divide the chilaquiles among 4 plates (or just eat it all yourself). Sprinkle with the feta and hot sauce, if desired. Serve immediately.

Note: original recipe calls for chopped onion, cilantro and sour cream, which I’m sure all kick this up a bit, but (1) I forgot the onion and sour cream when I made this and (2) not a cilantro fan. But try it and let me know!

Tiramisu–A Variation


Well then.  Sometime toward the end of last year, I decided that 2011 would be the year of adventure.  I am not a risk taker by nature, but I decided–somewhere between surviving a partial bike ride down the side of volcano and one too many cocktails–that I needed to do a bit more with life, because, well, this is the only chance I get at it.  I’d read a book that was really terrible, but had one really good line in it about finding ways to say yes instead of reasons to say no.  That resonated with me, because–being an essentially risk averse person (read: lawyer)–before the word “maybe” is out of my mouth, my mind has come up with 73 scenarios as to why something may not be a great idea.  It’s pretty hard to jump on the adventure bandwagon when your go-to response is no, right?

All this to say that I decided that I needed to change into more of a yes! that sounds fun!! person and so far this year, I’m doing a stellar job if I do say so myself (one good thing about being Type A is that when you set your mind to something, you’re always aiming for that gold star…).  The upside is that since January, I’ve been to Morocco, NYC, Los Angeles, Monterey, Cozumel and just got back from Ireland last night (hello, jet lag!).  Yeah, I don’t recognize myself either.  The downside is that I was home for only one full week in April, much of which was spent looking for a fabulous fascinator, which dramatically cuts down on the cooking going on chez moi.

I did manage, though, to whip up a wee dessert a couple of weekends ago, which I’m going to suggest you tuck away for those moments when time is not on your side but you need something decadent and impressive.  I’ve wanted to make tiramisu since I took that culinary boot camp last fall and I vaguely remembered from the class that it was one of those things that could be put together quickly and left to its own devices before serving.  That, and I had half a container of mascarpone left from my polenta adventure.  Always helps when you have a main ingredient on hand.  The one thing I did not have was the lady fingers and while my mind was swirling with visions of rum and cokes (I’d just gotten back from Cozumel) and rolling fields of heather (I had just bought my ticket to Ireland), I couldn’t for the life of me think where in all of the city of Chicago I could find them.  I also didn’t have enough time to go here, there and everywhere looking for them, so I decided that I’d substitute another cookie.  Lucky for me, I was standing in Trader Joe’s when I made that decision and decided to snag some ginger crisps and call it a day.

Unlike my other experiments, this one actually worked! Shocking, I know.  It couldn’t have been easier to put together (the recipe called for instant espresso, but I just used really strong coffee) and the crisps worked well after I decided to add several layers.  I loved the spice that the ginger added to the recipe, and truth be told, I liked my version better than the traditional because I find that lady fingers can get a bit soggy and heavy, whereas the ginger crisps soaked up the mascarpone filling without becoming mushy.

I’ve promised myself that I’m home for a good stretch now, and I’m looking forward to being back in the kitchen whipping up fun items, taking pictures and posting.  What can I make for you?

Tiramisu–A Variation

  • 1/4 cup water
  • 1/2 cup sugar
  • 2 tablespoons brewed espresso (I used very strong coffee)
  • 4 ounces mascarpone cheese
  • 3 tablespoons sugar
  • 1 tablespoon of vanilla extract
  • 12 tablespoons heavy whipping cream
  • gingerbread crisps

Combine water and 3 tablespoons of sugar in small saucepan and bring to a boil to melt sugar (I did this in a measuring cup in the microwave).  Remove from heat and add espresso.

Put mascarpone, sugar and vanilla in large bowl and beat with an electric mixer until smooth (I misread this and added the syrup (above). Really didn’t make a difference, but I suppose one should follow the directions?).  Add heavy whipping cream and beat until mixture is thick and fluffy.

Break ginger crisps in half and add about 3 layers in the bottom of each ramekin.  Add a couple of tablespoons of espresso syrup.  Spread half of the mascarpone mixture over top.  Continue with second layer of ginger crisps, syrup and mascarpone mixture.  Chill for 1 hour (you can also do a day ahead).

Polenta with Mascarpone


To say that I’m antsy is a huge understatement.  I think most people would say that I have spring fever, but spring has not yet sprung in the Chi even though we are nigh on April, so that can’t be it.  Or maybe it is. Maybe my internal body clock realizes that it’s [past] time to stop putting on 1746 layers just to leave the house to run an errand and my mind and soul are rebelling.  Who knows?  But, kids, I’m (as Blanche Devereaux would say), jumpier than a virgin at a prison rodeo (hi, Mom! Don’t pass out…).

Like last week’s brownies experiment, I needed something that was so mind-numbingly rote that my brain would shut off and stop sending off flares that would eventually lead me to doing something totally inappropriate.  I should pause here to say that when I get like this–when I get all bored and twitchy–I find myself getting into trouble.  I tend to get impulsive just to have something to do or something different to think about.  Rarely does this impulsiveness include practical things like organizing my closet or checking items off of my to-do list, because seriously, what fun would that be?  Usually I can stop myself from doing truly detrimental things and narrow the field to a haircut or buying a few pairs of shoes, but sometimes I’m led down the path of rekindling so-not-good-for-me-relationships or quitting a job.  True stories.  We haven’t gotten nearly that far this time, so I’m hopeful that the thought of a trip to Cozumel in a few weeks will quiet my mind enough to keep me out of therapy.  Or jail.  Either way.

So, yes, I had to come up with something to make that would occupy my mind for a bit, but that wasn’t so complicated that I wouldn’t do it.  I decided on polenta, because I hadn’t had success with it in the past, so there was a good challenge involved and it only has a few ingredients, so I wouldn’t get discouraged.  A friend mentioned that she’d made polenta using cream cheese, and my mind instantly went to mascarpone, because it has just about the same consistency but is much more yummy.  Plus I’ve always wanted to use mascarpone in something, because it sounds so fancy.  I mean, would you be reading this post if it were called Polenta with Philly Cream Cheese? Methinks not.

Honestly, it couldn’t have been easier.  A total of 5 ingredients (water, cornmeal, salt, sugar and mascarpone) and 30 minutes later I had a side dish that I had to stop myself from devouring like it was my job.  It was also perfect, because it required a fair amount of watching and stirring, and I learned that if you stare at a swirling mass of cornmeal long enough, your mind really will shut off (to the point that the timer may go off for a good minute before you realize it’s yours).  Mission accomplished!  The polenta was creamy and slightly sweet from the mascarpone.  It tasted ridiculously decadent, and even though I just served it with slow cooked beef I did in the crockpot and steamed spinach, I could easily see this making it to dinner party plates.


It was an excellent distraction, which I needed, but unfortunately one cannot stir polenta all day every day.  Any suggestions on ways to keep myself out of trouble are happily welcomed. In the meantime, I just ordered these:

Polenta with Mascarpone (adapted from Bon Appétit, August 2010)

  • 5 cups water
  • 1 cup polenta (coarse cornmeal)
  • 1 1/2 teaspoons coarse kosher salt
  • 1 teaspoon sugar
  • 1/2 cup mascarpone cheese

Bring 5 cups water to boil in heavy large saucepan over high heat. Gradually whisk in polenta, then 1 1/2 teaspoons coarse salt and sugar. Reduce heat to medium-low; simmer until polenta is tender, thick, and creamy, whisking often and adjusting heat to maintain gentle simmer, 25 to 30 minutes (I would say that it took about 35 minutes to get it relatively smooth and thick).  Mix in mascarpone cheese. Season polenta to taste with salt and pepper.

Peppermint Patty Brownies


Do you ever have one of those moments when you realize that it is very possible that you are someone else’s crazy? Like, when you have to dig deep and say, “Self, you are about to become the punchline in someone’s ‘Oh my god, I used to know this crazy girl who…’ story if you don’t stop acting so, well, crazy.” ? I was (am?) there yesterday.  I asked someone a question that as the words were coming out of my mouth, the logical, non-Sybil side of me was screaming, “STOP TALKING!!! STOP. TALKING. RIGHT. NOW!!” but it was out and there was nothing I could do but own it and try to move on.  Yikes.

What this has to do with food is really nothing other than I decided to bake some brownies to occupy my mind (because I’ve never made brownies from scratch before so I thought it would be a good project) and try to bring myself back to a place that’s a little more Zen and a little less whirling dervish.  Baking has a calming effect on me mainly because I have to concentrate on measuring ingredients out and setting up bowls and not overmixing or underbaking and it’s hard to think about random acts of nuttiness as you are trying to get egg whites to reach a perfect peak.  For a very long time I’ve wanted to make brownies with Peppermint Patties in them because I love brownies and I love Peppermint Patties and so, why not?  I realized that putting them at the bottom of the pan would likely not be a good idea, so I decided to do a layer of brownie batter followed by a layer of Peppermint Patties and then topped by a layer of batter.  Keep in mind that I was watching the end of Kings of Pastry while I was thinking about this, so inspiration was running high.

It’s doing this–making up recipes–that makes me realize that I really have no idea what I’m doing in a kitchen, despite having taken classes and made my way through boot camp.  So when the original recipe called for 2 cups of sugar, I had to pause and try to figure out how to account for the fact that I was adding Peppermint Patties to the mix.  And then would that change the consistency of the brownies? And would the middle of the patties melt and harden and become inedible? And should I cut back on the chocolate? AND……! And before you knew it, I’d forgotten all about my moment of crazy the day before since I had now spiralled down into an abyss of culinary kookiness.  But unlike my other bout of WTF?, I was the only witness and could easily conceal all evidence if need be.

After a bit of tweaking and doubling the baking time, I have to admit to being pretty happy with my experiment.  They’re a little crisper on top than I’d normally like, but the center is moist and fudgy and I cut them so there’s a Peppermint Patty in each square.  The sides (which are usually my fave part of a brownie) were much too crunchy, so I had to cut them off.  I’m not sure if that had to do with lining the pan with foil or that I had to bake much longer than recommended (I think the suggested pan size is too small).  But the absolute best part is that I was completely distracted, which is exactly what I wanted (more than I wanted a whole pan of warm brownies, which says a lot).  I feel better, I can think back on what was said without cringing and calm has returned to my world.  But…there’s one lingering thing nagging at me.  If being in a kitchen can make me this happy so quickly, what the *$)#%& am I doing sitting in an office all day….?

Peppermint Patty Brownies (adapted from Gourmet, October 2003)

Read more of this post

Kalua Pork


Aloha! Even though it’s hard to believe–especially considering I have to wear 12 layers of clothing in order to leave the house–last week this time I was in Hawai’i, learning to surf, sipping mai tais, flirting with pilots and generally enjoying being warm and toasty (not necessarily at the same time or in that order).  It was a glorious vacation full of snorkeling, paddle surfing, good friends, lots of sun, even more laughs and delicious fresh food.  I will spare you all of the typical vacation stories, except for the one that involves me attempting to ride down the side of a volcano in Maui.  As we’ve discussed before, I am not an adventurous person by any stretch of the imagination.  Most of my beach vacations have involved a lounge chair, magazines, naps and sidling up to the bar the minute it opens.  This time around, I travelled with people who like to do things on vacation, which is a completely novel and foreign concept to me.  I gamely went along with all of their plans, mainly because I’m a people pleaser, but there was a part of me that thought it all sounded like fun.  And! I like to believe that I’m one of those people who will try anything [within reason] once.

You should note those brackets in the sentence above, because in no world is riding a bike down the side of a volcano within reason. It’s crazy, stupid and mind-numbingly frightening.  In theory it sounded like fun and a story that I could tell well into my golden years, but in practice it was terrifying.  It started with a 1:30 AM wake up call so we could drive to the van that would take us to the top of the volcano to watch the sunrise (which was great, except it was about 30 degrees outside.  I will say feeling as though I could touch the Big Dipper was worth having to put on a fleece and jeans in Hawai’i).  After the sunrise, we were taken by van down to a “reasonable” spot on the volcano where the bike ride would start.  They lined us up shortest to tallest, which meant I was third in line.  Then they handed us motorcycle helmets.  It’s at this point that I should have thought, “Heather, what the $#(^&$* are you doing?” Instead, I thought that my helmet matched my nail polish nicely.  I only started to get nervous when they pulled the bikes out of the trailer.  They looked like fold up bikes, the chains were rusted and the seats were a little loose.  My hands started to shake when the guide told us to just ride the brakes down the winding, twisting curves of the volcano.  I’m sorry, what now?  But, because I am generally a follower, I got on the bike and started pedaling (or really, just keeping my feet on the pedals and hanging on for dear life).  I don’t think I had gone 50 yards before I started screaming in my head.  Another 100 yards and I was screaming out loud.  On my right was a sheer drop off.  On my left was traffic.  I couldn’t look behind me and I was riding the brakes so hard that the people in front of me were 2 curves ahead, so I couldn’t see them.  Finally, we pulled over and I jumped off the bike, handed my helmet to the guide and went to the van following us where it took me a good 10 minutes to start breathing normally.  I’d like to tell you that I wish I’d finished the bike ride, but there’s no part of me that feels that way. NONE.  Good on the people who did (including my friends)–you’ll have much more interesting stories at the nursing home.

After the ride [in the van], we stopped in the lovely Oceanside town of Pai’a where we were able to relax on the beach and thank the powers that be that we were still alive.  We found a cute storefront restaurant that served homemade kalua pork (so homemade that the woman behind the counter pulled a tupperware container of pork out of the refrigerator and mentioned that it had come out of her oven that morning). 

Over the course of the week, kalua pork had become a fave of mine (along with spam musubi–next recipe!).  Kalua means to cook in an underground oven, but lucky for those of us who live in highrises, you can do it in a crockpot.  It’s basically a slow roasted pork shoulder, which is then shredded and served over rice.  I’m all for keeping the integrity of local dishes, but I see a lot of possibilities with this one–the addition of ginger, hot peppers, other vegetables… It couldn’t be easier, especially with a crockpot, but can be done in the oven as well. The use of liquid smoke–a first for me–gives it the taste of an outdoor barbecue, which is great since it’ll be a long while before there are any outdoor activities in the Chi.  Riding down a volcano doesn’t seem so bad if it gets me outside… Right?

Kalua Pork

  • 3 lb pork shoulder
  • 1-1/2 teaspoons liquid smoke
  • 2-1/4 teaspoons Hawaiian salt, or sea salt, or kosher salt

Preheat oven to 350-400 degrees F. Pierce pork all over with carving fork or score with a knife. Rub salt and liquid smoke into meat. Place pork fat side up in a roasting pan or deep casserole dish. Cover and roast in oven for 2 1/2-3 hours. Remove the pork from pan and shred with two forks. Makes six servings. (I used my crockpot on low for 5 hours.  In the last 1/2 hour, I added about a cup of shredded cabbage, which I’d had at one restaurant.  Drain off excess liquid before serving over rice).

Cinnamon Rolls


I’m a total morning person. If I have work to do, I’d much rather go to bed at 10pm and wake up at 4am than stay up late.  Obviously I was a lot of fun in college.  I think I was one of the few people who actually left parties to go to bed (plus my grandfather always said nothing good happens after midnight.  Now, we all know “good” things can happen after midnight, but when you think back on it the next morning, it’s unlikely to fall into any category that constitutes good for a grandfather.  I digress…).  This saved me from gaining the notorious Freshman Fifteen, because I was tucked in well before the late night pizzas were delivered.  Senior year, I instituted the 11:30pm rule in our house which meant that on a school night, no one was allowed to wake me up unless the house was on fire, I was on fire or someone had died.  Don’t you wish you’d lived with me?  The 11:30 rule has become the 10:30 rule since I now live in a CST timezone.  I’m really not kidding about this; I’ve actually had friends ask if they can break the 10:30 rule to call me (I usually say yes…).

I have no idea where I was going with this (I actually wrote that paragraph last night and then, guess what? I got sleepy, so I’m finishing it this morning and have no idea what I was going to say next.  True story.).  At any rate, I truly believe that breakfast is the most important meal of the day for many reasons, but it’s rare that I have anything more than cereal.  I really want to be one of those people who wakes up and squeezes orange juice to go with my freshly made waffles and crisp bacon, but for all of my morning person-ness, this is likely never to happen.  Why would I do that when there are perfectly good brunch spots within walking distance? I’m all for reinventing the wheel recipe-wise, but not if it’s going to stand in the way of bacon, you know?

So I was all over making these cinnamon rolls because I was craving them and it was too cold and rainy to go outside just for baked goods, especially when I had a delicious recipe from The Chopping Block and all of the ingredients.  But, you know what? I should have braved the elements because these are so ridiculously time consuming that I didn’t even want them half way through.  Seriously. It took me an hour to make the dough, what with the cooling times and mixing and figuring out how many ounces are in 3-3/4 cups of flour (that last part has more to do with my math skills than the recipe).  At any rate, I decided to just let the dough rise overnight, because it was close to lunch time by the time I finished making it and I couldn’t be bothered.  Putting them together was another lengthy process and all I could think was thank goodness there was no one waiting for these because they would likely have given up on me and gone out to get the canned version that bakes in 10 minutes.

That said, they are as ridiculously tasty as they are ridiculously time consuming.  The dough is sweet and chewy and I created a little icing based on the bourbon bread pudding version that is lick your fingers worthy.  So, if you are a total morning person who wants to spend some quiet time kneading dough while everyone else sleeps, make these this weekend.  Otherwise, I’ll catch you at brunch.  I’ll be the girl in the back cozying up to a plate of bacon…

Cinnamon Rolls (courtesy of The Chopping Block)

Read more of this post

Chicken Noodle Soup


I spent a very fun weekend in Texas and if I thought I could replicate the yummy bbq from Salt Lick, I’d do it post-haste.  Unfortunately I was too busy debating whether it would be appropriate to move to Austin just for ribs (people have moved for sillier reasons, right?) and didn’t pay enough attention to how the deliciousness was made, so you’ll have to trust me on this one or make a trip down there.

I was lucky enough to bring back some very style-y cowboy boots, but also seemed to have brought back a bit of a cold that wasn’t enough to knock me out completely, but just enough to annoy me and curse the coughing lady next to me on the plane.  Normally when I have a cold I crave tuna (don’t ask, because I really can’t explain it), but the stuffy nose and scratchy throat were crying out for chicken noodle soup.  Now, I’m a Campbell’s girl all the way when it comes to these things. 

When you’re sick, fancy soups can’t beat the comfort found in that red and white can.  Whenever I was home from school with a cold (or more likely strep throat which I got ALL THE TIME), my mom would tuck me under the covers on the sofa so I could watch tv, surround me with my favorite stuffed animals and heat up that condensed chicken noodle goodness.  Other soups she’d make from scratch, but for some reason every mom knows that few things can beat Campbell’s in a pinch.

Admittedly, making it for myself is not as comforting, but it did make me feel better.  As I sat on the sofa watching terrible television (where’s a good Lifetime movie when you need it??), I started thinking whether I could make my own version.  Why I feel the need to try to recreate foods that are perfectly fine already is a question I ask myself repeatedly, but what else would I write about if I didn’t? 

Also, I’m sure there are many grandmothers out there who have a tried and true chicken noodle soup recipe that would put my efforts to shame–one that involves boiling chickens and making stock and chopping vegetables–but when you’re sick and in need of food, that’s the kind of energy you just don’t have (if any of you would like to let me borrow your grandmother next time I have the sniffles, holla!). 

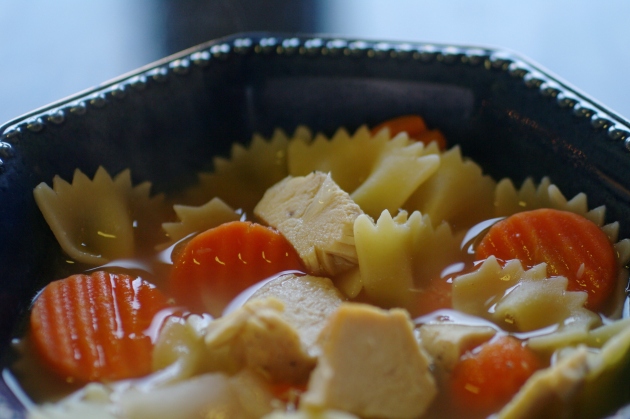
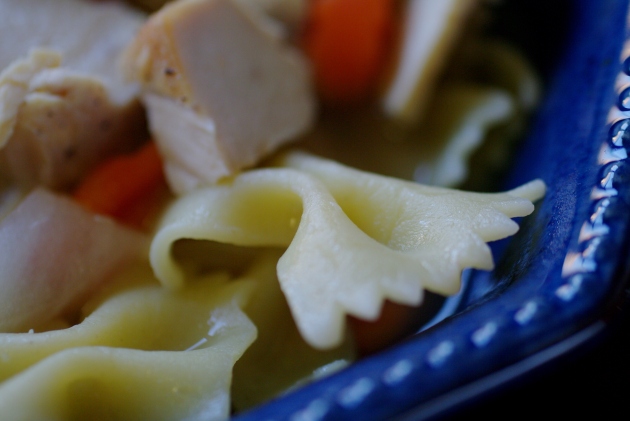
I basically roasted some chicken breasts, cooked up some pasta and threw it all into my Le Creuset to simmer with onions, carrots and broth.  As someone who really believes in the stirring and watching and checking, this couldn’t have been easier and–surprisingly–tastier.  No, I really didn’t think it would all come together (I rarely, if ever, cook anything without a recipe), but it did and in about 45 minutes (roasting the chicken took about 40 minutes, in which time you could put everything else together).

So while I can’t say I’ll forsake Campbell’s next time I’m sick, this is a hearty substitute when condensed versions just aren’t cutting it.  Let’s hope I make it through winter without any need for either (knock on wood)…

Chicken Noodle Soup

  • 2 large chicken breasts, roasted (or baked) and chopped into bite size pieces
  • 1 medium sized onion, diced
  • 2 cups frozen crinkle cut carrots
  • 3 14.5 ounce cans of chicken broth
  • 1 box bowtie pasta
  • 1 tablespoon olive oil
  • salt and pepper to taste

While chicken is roasting (about 15 minutes before it’s done), heat olive oil in stock pan and add onion, sautéing until tender.  Add chicken broth and carrots, bring to a boil and then reduce heat so it’s simmering. 

In separate pot, cook pasta according to package directions, but undercook by about 2 minutes (I originally thought of cooking the pasta in the chicken broth, but didn’t have enough broth to cover all of the pasta.  I think it might work. Try it and let me know!). 

Add chopped chicken to broth, then drain and add pasta (it will finish cooking in the broth).  Add salt and pepper to taste.  Serve hot (and preferably with a good movie).

Guest Post: Not Your Grandmother’s Pot Roast


Kids, I’m in love with these guest posts!  Not only have I gotten a slew of new recipes to try out, I’m saved from having to fret about what to post come Tuesday night.  Today’s recipe comes from a college friend, Mikie, who is living across the pond in Manchester (remind me to tell you why Manchester will always have a special place in my heart one of these days).  Mikie has used one of my favorite kitchen appliances, the crock pot, to take pot roast from hmm…? to mmm!!! while you sleep.  The red wine, lots of veggies and a side of polenta make this Sunday dinner something you’ll be craving all week.  Who said there was no good food in England? You can find more of Mikie’s British adventures at http://wannabewayfarer.blogspot.com/.

Since being invited to guest blog on Pestle Mortar I’ve been debating about which recipe to send. I have lots of favorites, and like to experiment with new ones, but I wanted to choose one that was suitably tested and perfectly delicious. I had an “ah-ha” moment this morning when I started getting out the ingredients to prep Sunday dinner. “This is it!” I thought. Why, you ask? I use a pestle and mortar in this recipe. Perfect!

When MRN and I got engaged, one of the first gifts we got was a slow cooker (née crock pot). Even though they’re perceived to be throwbacks to the 1950s (think June Cleaver and aprons), the slow cooker was actually invented in the 60s and dubbed the crock in the early 70s. I was super excited. I’d never had one, and kitchen gadgets to me are much like power tools to my husband– my own personal version of crack. But what to cook? I started with soups and stews, and then my friend MC who works in the online division of a gigunda book conglomerate gifted me with two gourmet slow cooker cookbooks. Yes, you read that correctly– gourmet. The books have recipes from all over the world– all easy to prep, fancy enough to impress company and, cooked in a slow cooker. Score!

This one is by far my favorite. One, because it’s super easy to prepare. And two, because it will blow the socks off your preconceived notion of a pot roast. Dry and tasteless no more, this baby is full of flavor, beautifully presented and perfect for a posh dinner party. Pot roast for a dinner party? Awww-yeah. And the best bit? Like butter is to French cooking, wine is to Italian (don’t worry non-wine drinkers– the alcohol cooks out and you’re left with this rich, wonderful flavor). Says author of The Gourmet Slow Cooker, Lynn Alley: “Pot roast is a big favorite throughout northern Italy, just as it is in the United States.” Who knew? The bonus? Slow cooking makes your whole house smell homey and amazing. 30 minutes of prep, 8 hours of slow cooking and voilá! Yummy goodness.

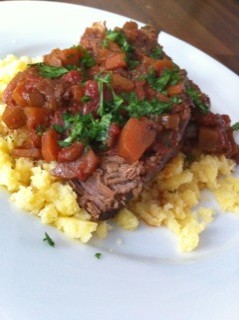
Italian Pot Roast with Polenta

  • 1 cinnamon stick, broken into pieces
  • 4 whole cloves
  • 3 allspice berries
  • 6 black peppercorns (I usually use a bit more b/c I’m a pepper fiend; and I’ll add ground pepper to the sauce once it’s ready for the slow-cooker)
  • 3 tbsp olive oil
  • 3 1/2 lbs beef pot roast, trimmed of excess fat
  • 1 yellow onion, finely chopped (I use one large or two small onions)
  • 4 cloves garlic, minced
  • 2 celery stalks, sliced (I like more veggies, so I usually use 3 of each of the celery and carrots; you also end up with more sauce, the left-overs which you can save and use on egg pasta the next day)
  • 2 carrots, peeled and sliced
  • 1 cup hearty dry red wine
  • 1 (28 oz) can crushed tomatoes
  • Salt (to taste)
  • Chopped fresh parsley for garnish

Combine the cinnamon, cloves, allspice and peppercorns in a mortar or coffee grinder and grind into a fine powder.

Heat a large sauté pan over medium-high heat and add the oil. Add the meat and sear, turning, for 10-15 minutes, until browned on all sides (let me start by saying I hate electric stove tops. You can’t control the heat and everything heats faster. But working with what I’ve got, I cook everything on medium so it doesn’t cook too fast… tip from the electronically challenged cooker). Using tongs, transfer to the slow cooker.

Add the onion to the sauté pan and sauté, stirring frequently until soft and lightly browned (about ten minutes– the seared meat cooked previously will give your onions a nice carmelized color). Add the garlic and stir until you can smell the garlic (about a minute). Add celery and carrots and sauté for 3-4 minutes, until lightly browned. Add the spice mixture and cook for 2 minutes (the smell is intoxicating!). Add the red wine and cook reduce by about one-third (about 10 minutes). Stir in the crushed tomatoes and salt to taste. Simmer for a few minutes and then pour the sauce over the meat in the slow cooker.

Cover and cook on low for about 8 hours until the meat falls away from the bone.*

*Even though the beauty of a slow cooker is that you throw everything in and don’t have to touch it, I find that with this recipe, it’s great if you can spoon the sauce over the meat 2-3 times over the course of the 8 hours. The liquid soaks in and makes it even more succulent. Don’t worry if you can’t– it will still be delicious!

For the polenta:
You can make your own, but I buy the garden variety kind that you can find in the grocery store (Whole Foods or Trader Joe’s for those in the U.S.). Just as delicious and so much easier. Follow the package instructions to cook– but I’ll usually slice and brush with a little olive oil and grill it- about 2 minutes on each side until lightly browned. You can also boil the polenta (usually in the packaging) for about 30 minutes and then mush it (that’s the technical term) with a fork until it’s a grits-like consistency.

To serve:
Once the meat is cooked and tender, remove it from the crock pot with tongs, remove the kitchen string (if it had it) and slice into 1/2-1 inch pieces (it will be tender, but don’t worry if the meat falls apart– just scoop it all back in the sauce for some savory goodness). Place the sliced roast back into the crock put and allow to simmer for 5-10 minutes. It will soak up some of the sauce and make it even more delish. Portion polenta to warmed plates and spoon pot roast and sauce over the polenta. Garnish with parsley. Serve immediately.